Direct Plumbed Espresso Machines: Water Line Setup Guide
By Luca Moretti • 11th Aug
What to do
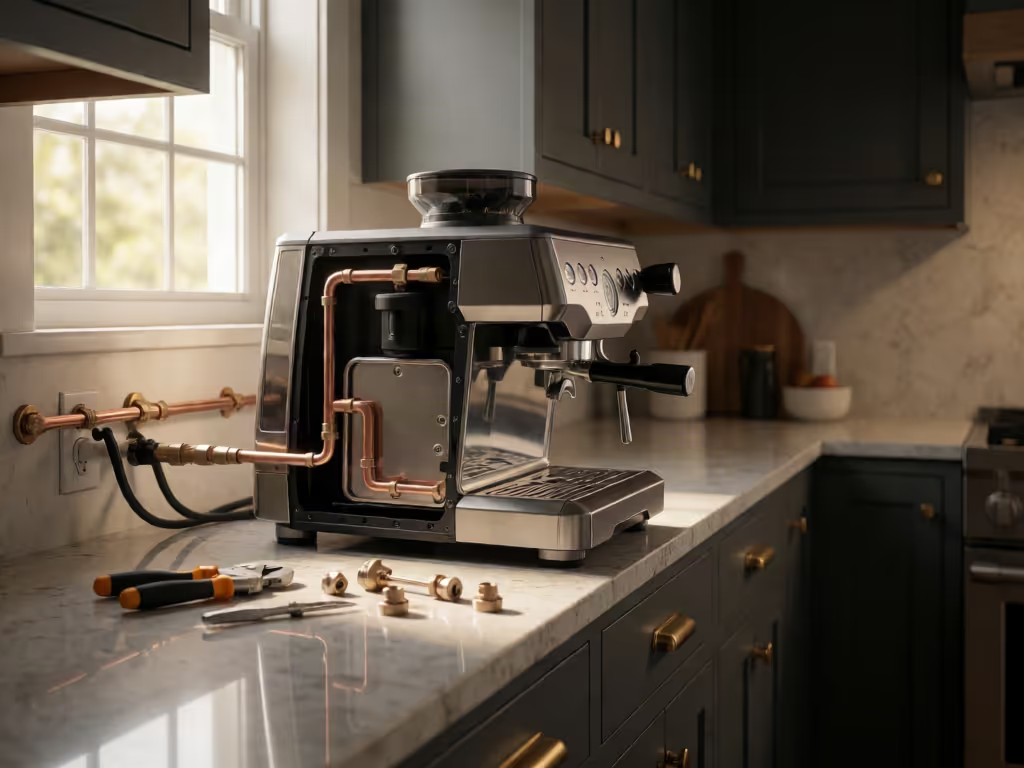
Yes, you can connect an espresso machine to a water line—but only when the exact model explicitly supports direct connection. The reliable sequence is to verify compatibility, plan treatment and an accessible shutoff, meet local plumbing requirements, then install, flush, inspect, and maintain the system.
- Start with: Check the manufacturer documentation for direct-water support, inlet specifications, pressure limits, and drain compatibility. Similar model names and rotary pumps do not guarantee plumbability.
- Then: Map the water path, treatment, regulator, shutoff, and tubing before installation. Cut and route tubing carefully, flush treatment media before connecting the machine, and inspect for leaks after pressurizing.
- Important prerequisite: Local code and backflow requirements apply, and direct plumbing is not universal. Use the machine’s specifications—not generic kit guidance—for fittings and pressure, and involve a qualified installer when required or uncertain.
A direct plumbed espresso machine uses a direct water connection instead of relying solely on a refillable reservoir. It can remove one small but persistent morning interruption: checking the tank before you grind. But an espresso machine water line is not a universal upgrade or a weekend shortcut. The dependable route is simple: confirm that your exact machine supports direct connection, plan water treatment and shutoff access, then install and test the line methodically.
If you have ever stared at fittings, tubing, filters, and machine manuals until the whole project felt bigger than coffee, pause here. You do not need to solve every plumbing question at once. Make a short plan, verify each checkpoint, and you can build a routine with bounded choices, repeatable shots (taste you can set a clock to).
Step 1: Decide whether a water line fits your routine
A plumbed-in coffee machine uses a direct water connection rather than operating only from an internal reservoir. It is different from a reservoir machine, which you refill manually.
You do not need a water line to make espresso. The La Marzocco Linea Micra, for example, uses a self-contained reservoir, and a reservoir remains the better choice when you rent, move often, cannot alter cabinetry, or want the machine to live away from a sink. If you stay with a reservoir, understanding espresso water reservoir design can help you choose a setup that is easier to use and maintain.
Direct plumbing makes practical sense when these statements are true:
- You make enough drinks that reservoir refilling breaks your rhythm.
- The machine will have a long-term home near an accessible water source.
- You can accommodate water treatment, a shutoff valve, and periodic cartridge changes.
- You are comfortable involving a qualified installer when local rules or the work itself calls for one.
- You want a cleaner, more consistent workflow, not a claim that plumbing itself will make espresso taste better.
A water line removes refilling; it does not remove the need to manage water quality, grind, dose, and brew time.
For a first calibration prompt, ask: Will this save a meaningful step in my actual morning, or add a permanent maintenance system to a setup that already works? Either answer is useful.
Step 2: Confirm that your exact machine is plumbable
Never assume that a similar-looking model, a related version, or a machine with a rotary pump can accept line water. Direct-connect capability is model-specific.
As documented examples, the Rocket Espresso R Cinquantotto and Giotto Cronometro R can draw from either an internal reservoir or a direct water connection. By contrast, the Giotto Cronometro V is shown as reservoir-only. That one letter is a good reminder: check the manufacturer documentation for the exact model and variant on your counter.
The Rocket Espresso R58 Cinquantotto is one example of a home machine described with a rotary pump that can use its reservoir or an optional direct-water connection.
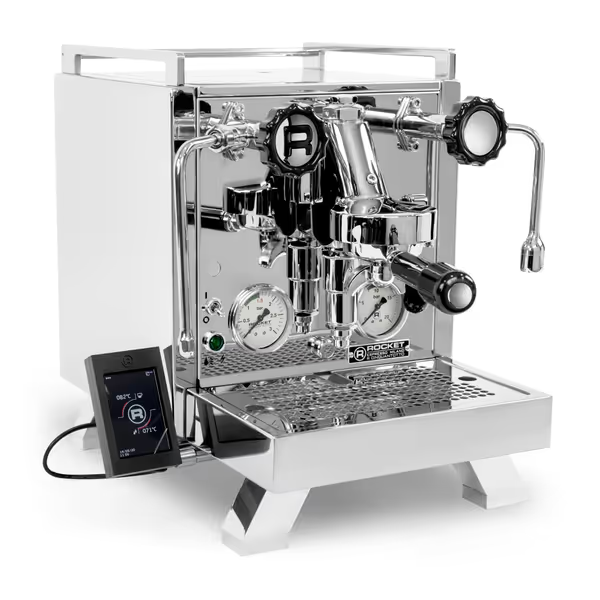
Rocket R58 Cinquantotto
Dual boiler precision for consistent, café-quality espresso every morning.
$3500
Boiler TypeDual Boiler
Boiler TypeDual Boiler
Pros
Consistent temperature for perfect espresso & steam
Programmable auto-on for ready-to-go mornings
Rotary pump allows quiet, direct water line plumbing
Cons
Potential for unit defects or brew pressure issues
Some reports of customer service challenges
Customers praise its high quality, consistent performance, and excellent steam, though some report defects or service issues.
Customers praise its high quality, consistent performance, and excellent steam, though some report defects or service issues.
Before buying parts or booking installation, find answers in your machine documentation to these four questions:
- Is direct connection explicitly supported? If not, keep using the reservoir.
- What inlet fitting and installation method does the manufacturer specify? Do not select tubing or adapters based on another machine's guide.
- What incoming-water requirements apply? The machine's requirements take priority over generic setup advice.
- Does the model support a drain connection, and is that something you actually want?
One retailer describes rotary pumps in dual-plumbing machines as engineered to operate from either pressurized line water or a gravity-fed reservoir. Treat that as a helpful starting point, not a blanket compatibility rule.
Step 3: Plan the water path before cutting anything
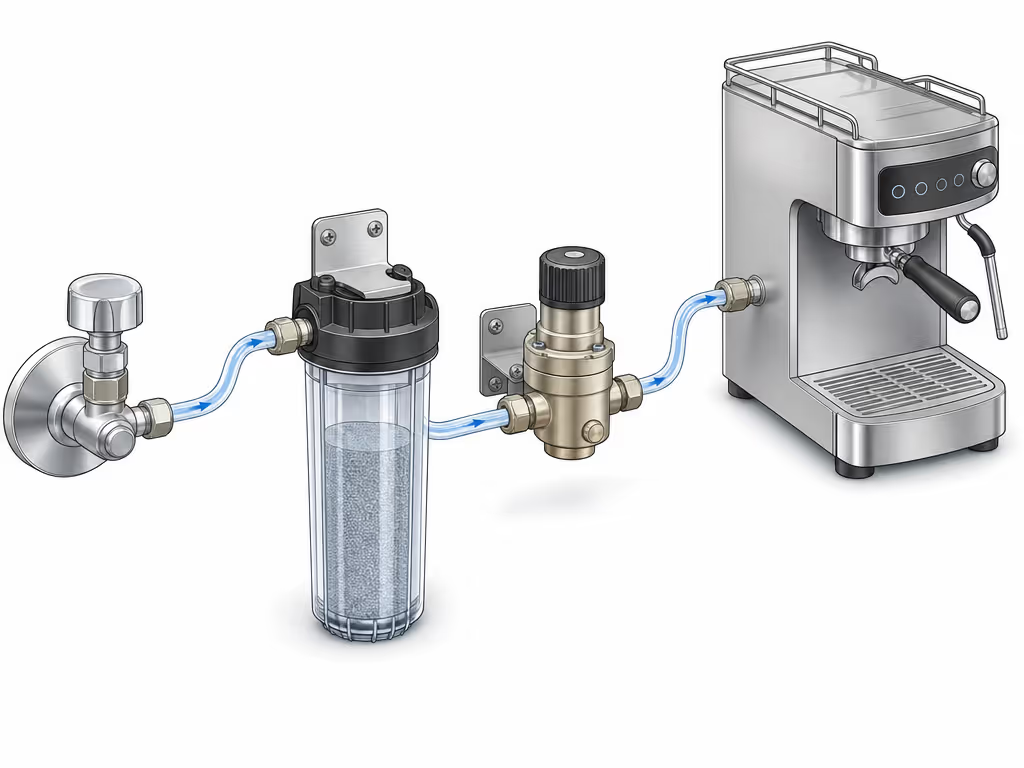
Think of the installation as a short chain, not a pile of components. One retailer's direct-plumb treatment setup uses this order:
Angle stop valve → softener cartridge → outlet tee/bleed valve → pressure regulator → machine
That sequence is an example, not a universal bill of materials. Your machine manufacturer, treatment-system instructions, and local plumbing requirements determine the final design.
Put treatment in the plan, not on the someday list
In the retailer treatment setup above, the softener cartridge sits in the water path before the machine. Do not treat water treatment as optional clutter under the counter. Select a treatment approach appropriate to your incoming water quality and follow its instructions. Water-hardness testing is a useful early checkpoint because it helps turn "I think our water is hard" into a maintenance decision.
Include a reachable shutoff
Plan a shutoff that you can reach without pulling apart half the kitchen. The example system above begins with an angle stop valve for good reason: it gives you a clear control point for service and absences. One retailer recommends shutting off the supply if the machine will be unattended for more than 24 to 48 hours. Follow your own equipment instructions as well.
Do not guess at pressure
A retailer setup guide recommends 2 to 3 bar (30 to 45 psi) for its direct-plumb filtration kit and places the regulator between the treatment assembly and the machine. That range is useful context, but it is not a universal target. Set incoming pressure only to the specification approved for your exact machine.
Step 4: Address code and backflow before installation
A direct water connection is a plumbing installation, not merely an accessory connection. Where the 2018 International Plumbing Code is locally adopted, its water-supply provisions require supply lines and plumbing-fixture fittings to be installed to prevent backflow. Requirements for your home depend on the code adopted in your jurisdiction and your local authority.
This is the point to slow down, especially in apartments, condos, or homes where access is shared. Check local plumbing requirements and your building's rules. Use a qualified installer when required, or whenever you are unsure about tapping the supply, fitting backflow protection, or making a watertight connection.
The goal is not to make the project intimidating. It is to prevent the expensive kind of uncertainty: a leak behind cabinetry, an inaccessible shutoff, or a connection that does not meet local requirements.
Step 5: Run the tubing with slack and clean connections
Once the approved route and components are in place, keep the tubing work boring. Boring is good here.
- Cut tubing cleanly at 90 degrees.
- Do not crush, flatten, or kink it.
- Route it so it will not be pinched when the machine is pushed back.
- Leave slack in longer runs so fittings are not under tension and future service is easier.
- Follow the manufacturer's directions for inserting tubing and connecting the machine inlet.
One retailer-supplied kit includes 3/8-inch fittings, 3/8-inch LLDPE tubing, and a 10-foot tubing length. Use that only as an illustration of one system, not as proof that 3/8-inch is the right size for every espresso machine water line. The correct fitting size is the one specified for your machine and chosen installation components.
Step 6: Flush treatment media, then inspect every connection
Do not send freshly installed treatment media straight into the machine unless its instructions specifically say to. For help comparing espresso machine water filters, match the filtration system to your machine and local water conditions before flushing the line. In the retailer procedure described above, the recommended pre-machine flush is 3 to 5 gallons through the flushing valve before water is directed to the espresso machine.
After flushing, work through this short commissioning checklist:
- With the machine off, open the supply and inspect every joint for leaks.
- Confirm that the regulator is set to your machine's approved pressure.
- Turn on the machine and follow its manufacturer-specific priming or first-fill procedure.
- Run water through the group and hot-water outlet as directed by the manufacturer.
- Recheck all connections after the system has been pressurized and after the first use.
- Verify that the shutoff remains accessible.
Do not rush this stage to pull a celebratory shot. A five-minute inspection now is far better than discovering a slow drip after the machine is back against the wall.
Step 7: Decide whether you need an espresso machine drain line
If you want a drain, first check whether your exact machine has a drip-tray drain fitting or a compatible accessory. A drain is a practical consideration, but it also adds another plumbing connection. For many home routines, emptying the drip tray is a small, visible cleanup checkpoint that is easier than adding another plumbing connection.
Choose the setup that makes maintenance simpler for you, not the one that looks most complete on paper.
Step 8: Put maintenance on a calendar
Plumbing in is not "set and forget." Use machine-specific maintenance routines to account for how your heating system and water path affect cleaning and servicing. It simply changes the recurring task from reservoir refills to line and treatment upkeep.
Keep a short maintenance card near your coffee supplies:
- Weekly: Look beneath and behind the machine for moisture; check that tubing is not stressed or kinked.
- At each treatment-system interval: Test or otherwise assess incoming water as your treatment provider directs; replace cartridges on schedule.
- When away: Use the shutoff practice recommended for your setup.
- Whenever flavor turns flat, bitter, or unexpectedly different: Do not blame the machine first. Review beans, grinder setting, dose, brew time, and water-treatment status in that order.
For example, one retailer recommends replacing its softener cartridge after it has softened 1,700 grains of hardness or every six months. Your interval may differ with water conditions and the treatment system you install, so use the schedule that belongs to your equipment.
A calm final check
A direct plumbed espresso machine can make a busy household feel more orderly: no surprise empty tank, no carrying a reservoir to the sink, and one less decision before work. It is worth doing only when the machine supports it, the water is treated appropriately, the plumbing is compliant, and the shutoff is easy to use.
Start with the machine manual, sketch your water path, and get local installation guidance before purchasing fittings. Then lock in the few variables that matter: water source, treatment, pressure, and maintenance date. Like a simple dose-grind-time card beside the grinder, those constraints create a routine you can trust. From there, explore your machine's documentation and local plumbing options with confidence.
Related Articles